Writeup: FlareOn 2020: 006 - codeit
1. TLDR
2. Input data
The challenge file is here. Password: flare.
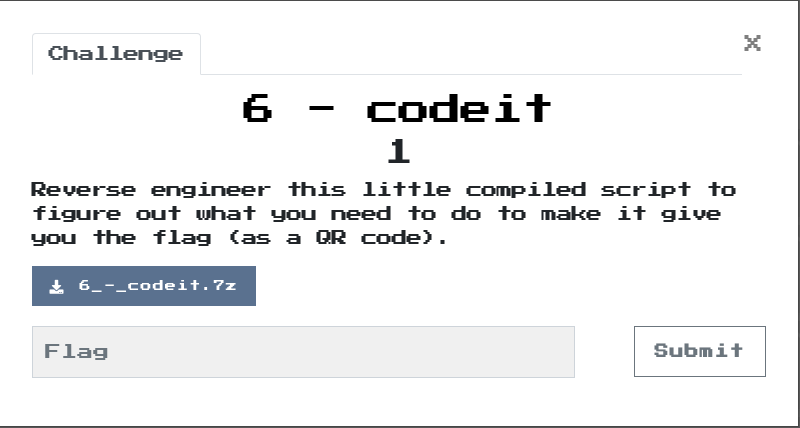
The subject of the task is the file codeit.exe, which is a compiled script. It is also known from the content of the quest that the flag has been hidden as a QR code.
3. Inspection of codeit.exe file
I verified the file using file tool:
$ file codeit.exe
codeit.exe: PE32 executable (GUI) Intel 80386, for MS Windows, UPX compressed
The file was packed with the popular UPX tool.
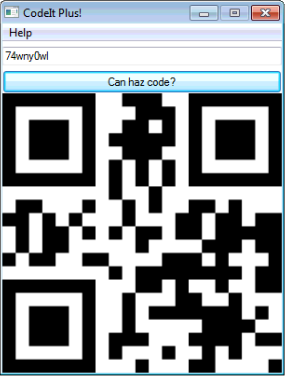
When the program was launched, the application window appeared:

The application allowed to encode the given text into a QR code:
4. Unpacking the file
Using the UPX utility, I unpacked the file:
$ upx -d -o codeit_unpacked.exe codeit.exe
                       Ultimate Packer for eXecutables
                          Copyright (C) 1996 - 2020
UPX git-d7ba31+ Markus Oberhumer, Laszlo Molnar & John Reiser   Jan 23rd 2020

        File size         Ratio      Format      Name
   --------------------   ------   -----------   -----------
    963584 <-    481280   49.95%    win32/pe     codeit_unpacked.exe

Unpacked 1 file.
I verified the unpacked file with the file tool:
file codeit_unpacked.exe
codeit_unpacked.exe: PE32 executable (GUI) Intel 80386, for MS Windows
Next, I analyzed the strings in the executable. The analysis result clearly indicated that the program was created by compiling the AutoIt script:
$ strings codeit_unpacked.exe| grep -i autoit
This is a third-party compiled AutoIt script.
5. Decompilation
I decompiled the file codeit.exe into the AutoIt script using the Exe2Aut tool. As a result of decompilation, the following files were recovered:
codeit.au3 - containing an obfuscated AutoIt script
qr_encoder.dll - a library implementing QR code support
$ file qr_encoder.dll
qr_encoder.dll: PE32 executable (DLL) (GUI) Intel 80386, for MS Windows
- sprite.bmp - a bitmap
file sprite.bmp
sprite.bmp: PC bitmap, Windows 3.x format, 299 x 299 x 24, image size 269102, resolution 3779 x 3779 px/m, cbSize 269156, bits offset 54
![]()
I opened sprite.bmp in hex editor. After the 54-byte bitmap header, I identified the repeated bytes 0xFF and 0xFE. Changing least significant bit indicates that the file contains hidden information:
![]()
6. Deobfuscation
I deobfuscated the AutoIt script by executing a script written for this purpose. All that’s left to do is do a manual analysis: name functions and variables, and understand the code. Due to the nuisance of this process, in Part #7 I have analyzed an essential part of the final version of the script.
7. Static analysis
The flag was written as a QR code, encrypted and hard-coded in the areyzotafnf() function code.
The way this function works is shown in the diagram below:
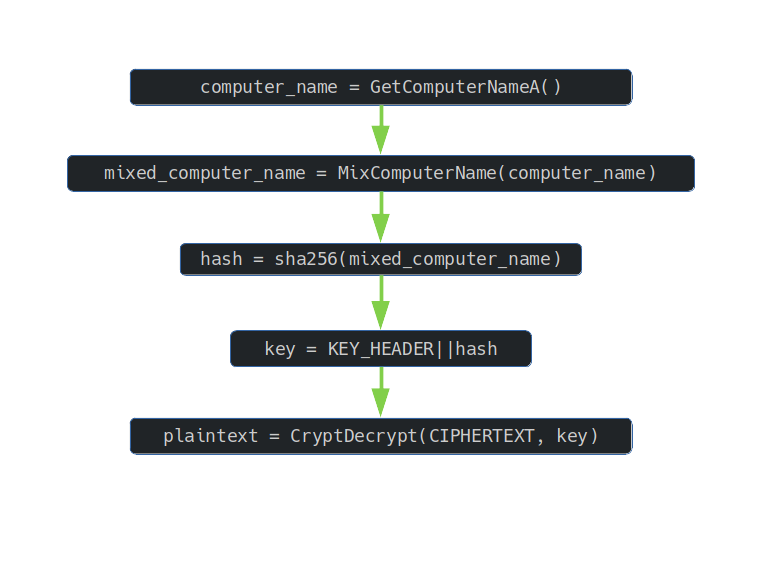
The NetBIOS name of the current computer is transformed by mixing function. Then the SHA-256 hash was computed from the result of this transformation. The concatenation of the fixed header and the computed hash was a CryptoApi compatible key that was used to decrypt the QR code.
Thus, in order to read the flag, one had to guess the name of the machine from which the key was derived.
How to get the expected machine name? The weakness of the whole solution was a MixComputerName() function:
Func MixComputerName(ByRef $computer_name_raw)
	Local $randomized_sprite_bmp = InstallSelectedFile(14)
	Local $hFile_sprite = CreateFileForReading($randomized_sprite_bmp)
	If $hFile_sprite <> -1 Then
		Local $hFile_sprite_size = GetFileSize($hFile_sprite)
		If $hFile_sprite_size <> -1 AND DllStructGetSize($computer_name_raw) < $hFile_sprite_size - 54 Then
			Local $in_memory_sprite_bmp = DllStructCreate("struct;byte[" & $hFile_sprite_size & "];endstruct")
			Local $is_success = ReadFile($hFile_sprite, $in_memory_sprite_bmp)
			If $is_success <> -1 Then
				Local $key = DllStructCreate("struct;byte[54];byte[" & $hFile_sprite_size - 54 & "];endstruct", DllStructGetPtr($in_memory_sprite_bmp))
				Local $sprite_offset = 1
				Local $mixed_computer_name = ""
				For $index = 1 To DllStructGetSize($computer_name_raw)
					Local $character = Number(DllStructGetData($computer_name_raw, 1, $index))
					For $shift_counter = 6 To 0 Step -1
						$character += BitShift(BitAND(Number(DllStructGetData($key, 2, $sprite_offset)), 1), -1 * $shift_counter)
						$sprite_offset += 1
					Next
					$mixed_computer_name &= Chr(BitShift($character, 1) + BitShift(BitAND($character, 1), -7))
				Next
				DllStructSetData($computer_name_raw, 1, $mixed_computer_name)
			EndIf
		EndIf
		CloseHandle($hFile_sprite)
	EndIf
	DeleteFileA($randomized_sprite_bmp)
EndFunc
Mixing the computer name was done by adding to each character the next character read 7 of the least significant bits from the sprite.bmp file, then rotating one bit to the right.
Therefore, it was necessary to ask about the content of the string of 7-bit characters. The last byte 0xFE was 90 in the sequence, so ⌈90/7⌉ bytes had to be read. For this purpose, it was possible to modify the script or write a piece of code, e.g. in python:
#! /usr/bin/python3

covert_message = [0xFF, 0xFF, 0xFE, 0xFE, 0xFE, 0xFE, 0xFF, 0xFF, 0xFF, 0xFF, \
        0xFE, 0xFF, 0xFE, 0xFF, 0xFF, 0xFF, 0xFF, 0xFE, 0xFF, 0xFE, 0xFE, \
        0xFE, 0xFF, 0xFF, 0xFE, 0xFE, 0xFE, 0xFE, 0xFE, 0xFF, 0xFF, 0xFE, \
        0xFE, 0xFE, 0xFF, 0xFF, 0xFF, 0xFF, 0xFE, 0xFF, 0xFE, 0xFE, 0xFF, \
        0xFF, 0xFE, 0xFE, 0xFF, 0xFF, 0xFE, 0xFF, 0xFF, 0xFE, 0xFE, 0xFE, \
        0xFE, 0xFF, 0xFF, 0xFF, 0xFE, 0xFF, 0xFF, 0xFF, 0xFE, 0xFE, 0xFF, \
        0xFF, 0xFE, 0xFE, 0xFE, 0xFF, 0xFE, 0xFF, 0xFF, 0xFF, 0xFE, 0xFE, \
        0xFF, 0xFE, 0xFF, 0xFF, 0xFF, 0xFE, 0xFE, 0xFF, 0xFE, 0xFF, 0xFF, \
        0xFF, 0xFE, 0xFE, 0xFF]

def main():
    message = "";
    character = 0
    for i in range(len(covert_message)):
        character |= ((covert_message[i] & 0x01) << (6 - (i % 7)))
        if i % 7 == 6:
            message += chr(character)
            character = 0
    print(message)

if __name__ == "__main__":
    main()
Running the script allowed to read a string of characters, which was the expected computer name:
aut01tfan1999
8. Reading the flag
So it was enough to modify the script so that the expected computer name was always set:

and run the AutoIt script:
$ "C:\Program Files (x86)\AutoIt3\AutoIt3.exe" "codeit_debug.au3"
After clicking on the Can haz code? Button, a QR code was generated:
After using the phone’s camera or any other tool (e.g. CyberChef) it was possible to read the decoded flag:
L00ks_L1k3_Y0u_D1dnt_Run_Aut0_Tim3_0n_Th1s_0ne!@flare-on.com